# Quick Start
Connect models, create a canvas, and choose the best first creation path for you.
Bomiio and AstraFlow share the same login entry and account system. After you enter Bomiio, you only need an AstraFlow API key and one episode script to start creating.
## Before you start
- A usable AstraFlow API key.
- One UTF-8 text script for a single episode. You can save it as `.txt`, or copy the body text directly.
- Valid rights to use the work content.
- Time reserved for your first pass at checking assets, storyboards, and generation tasks.
## 1. Connect AstraFlow
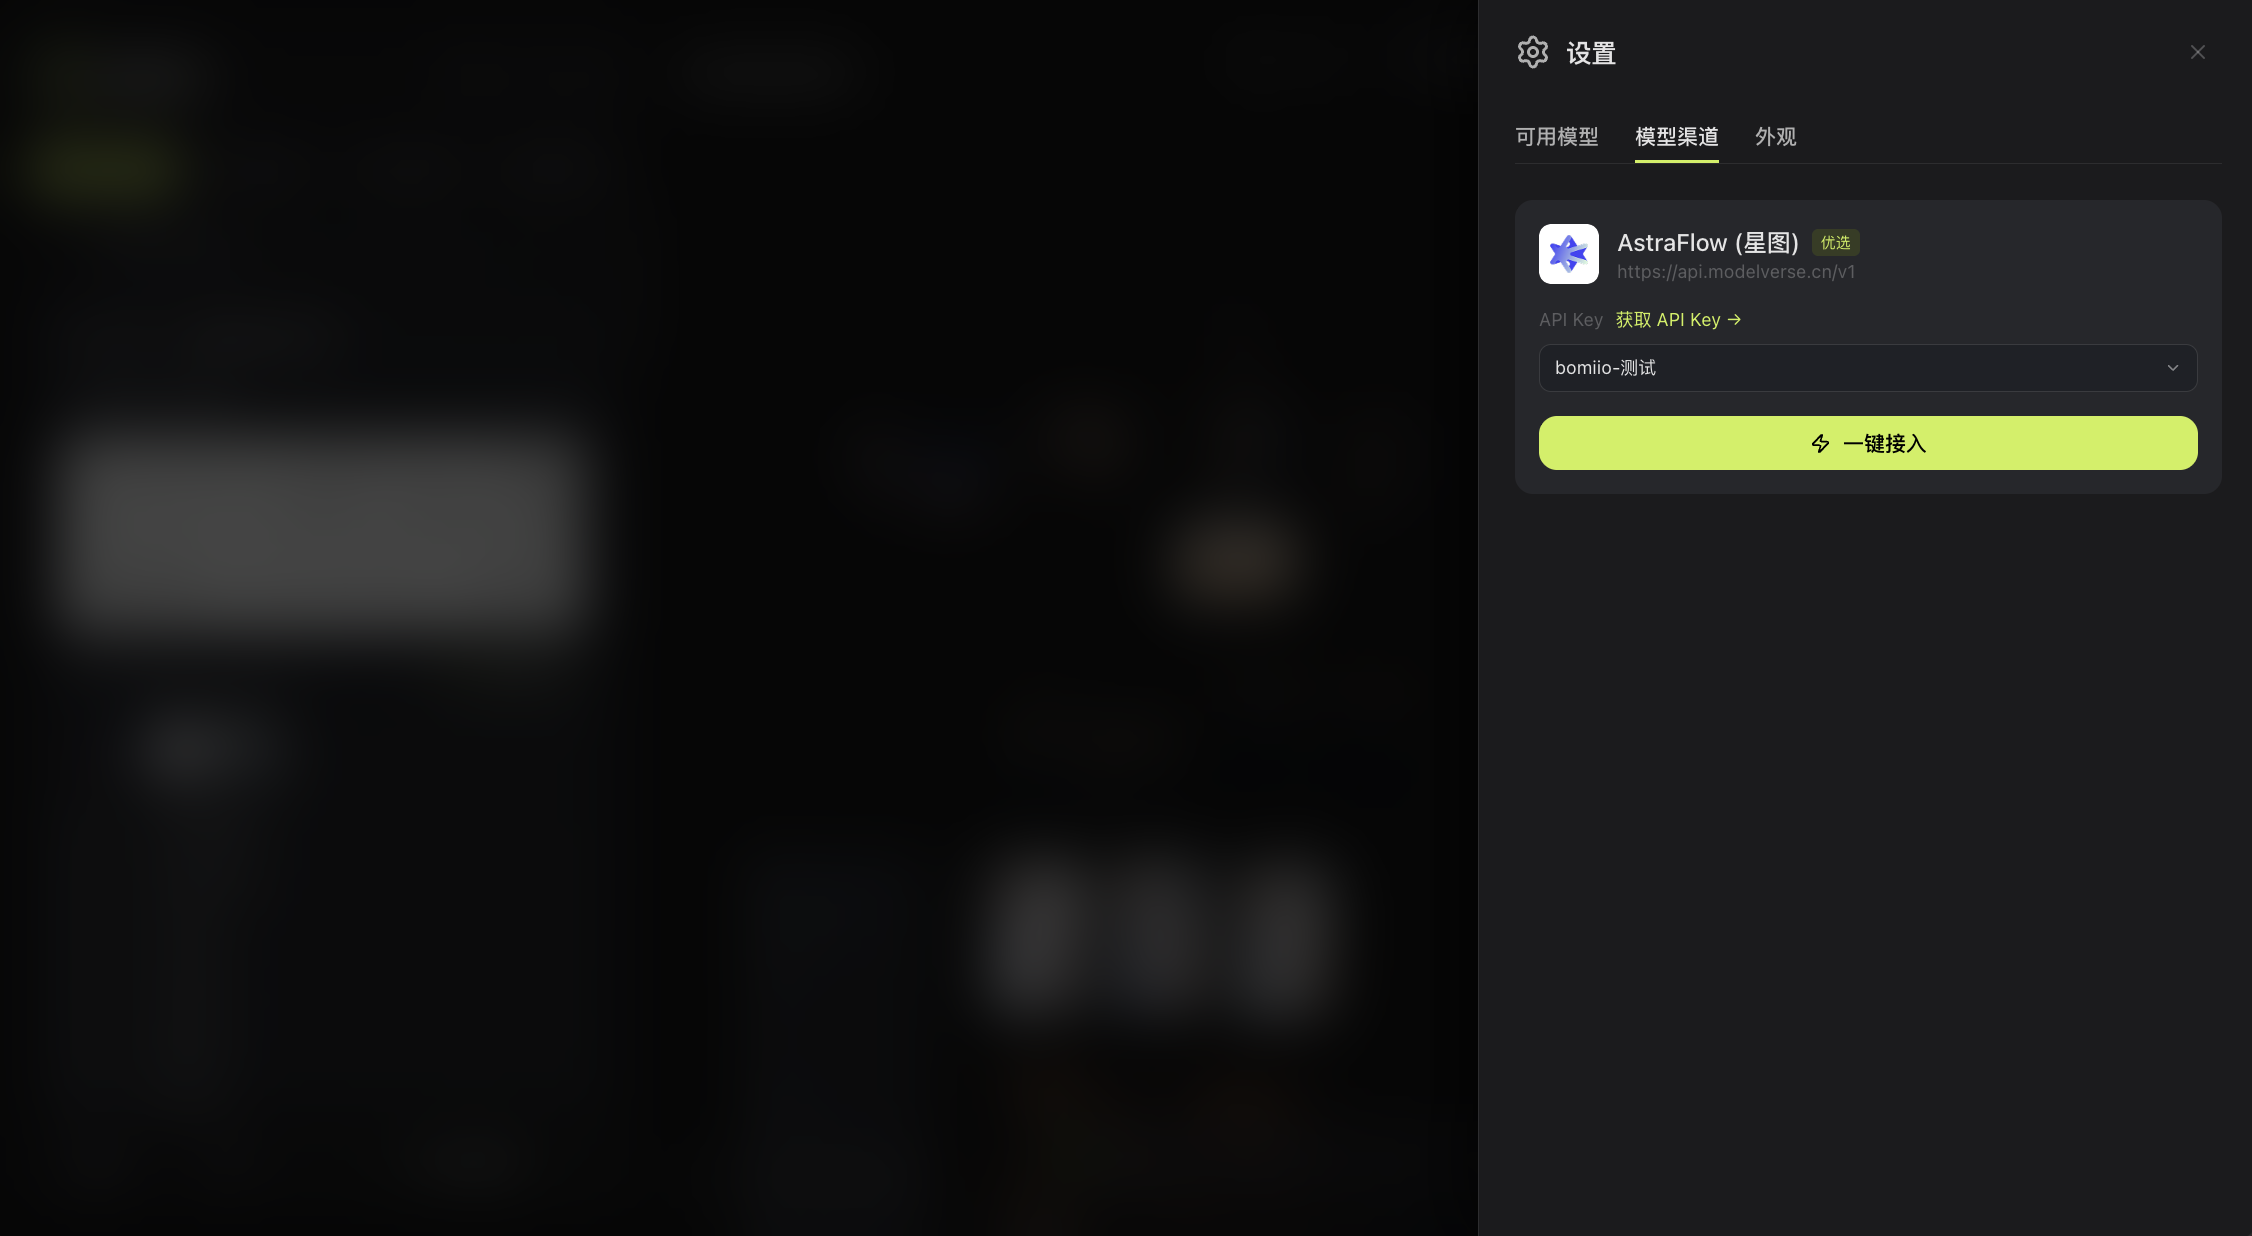
Go to the model API page in Settings, select or enter the AstraFlow API key, then click One-Click Connect. Bomiio imports the models available for the current key.
> The screenshot shows the AstraFlow API key selector and the "One-Click Connect" entry. Key names are only interface examples; use the entries actually available in your account.
> API keys are sensitive credentials. Do not put a real key in scripts, prompts, screenshots, or troubleshooting notes.
For full steps, see [Connect AstraFlow](/docs/bomitv/getting-started/astraflow.md).
## 2. Choose how to start
### Start from a single-episode script (recommended)
This is best for users who want the Director Console to handle script breakdown, assets, storyboards, and video creation quickly.
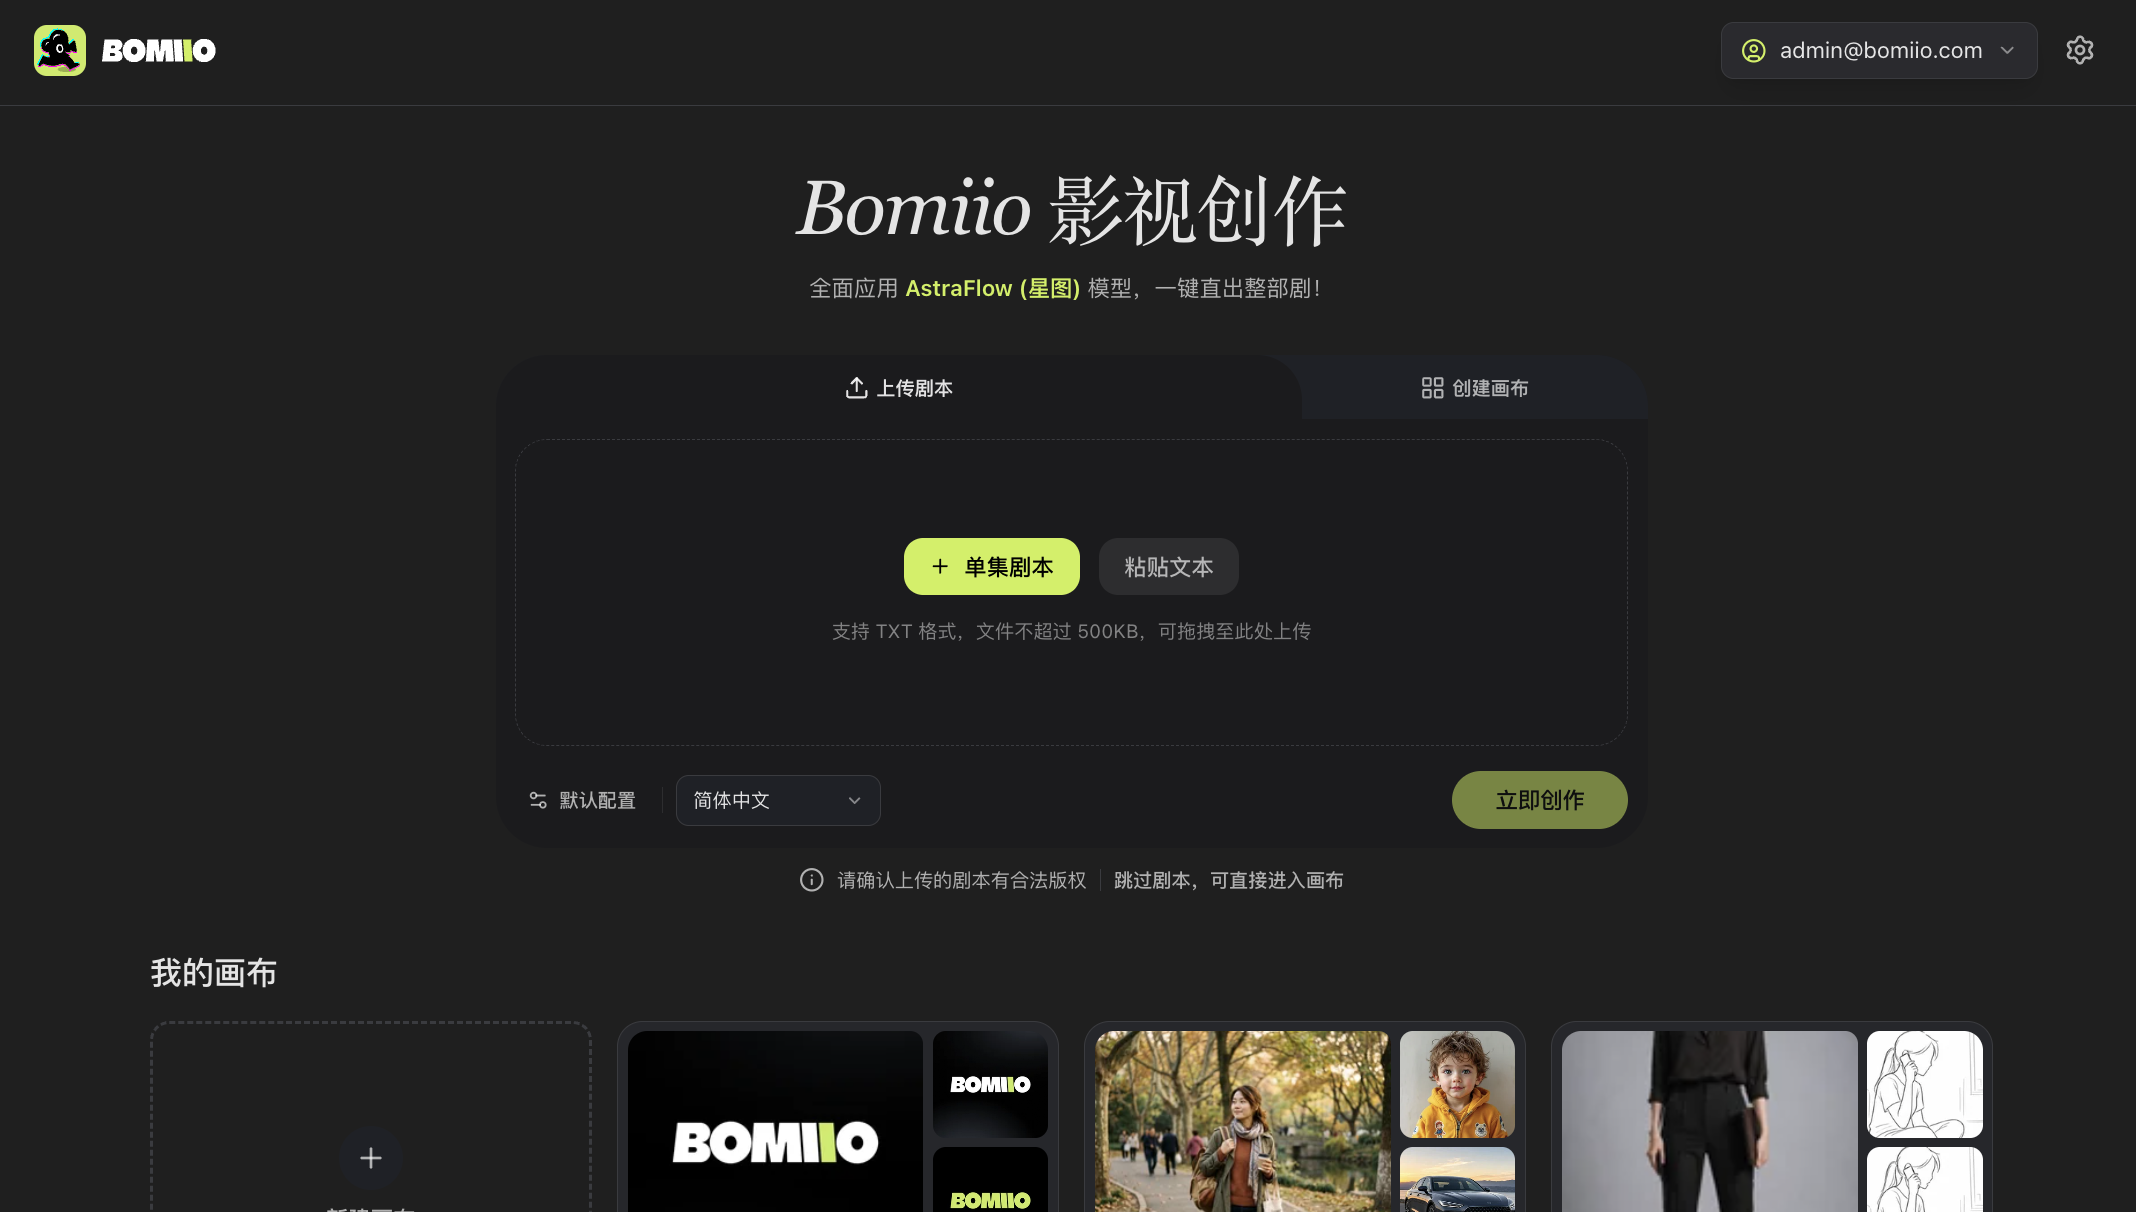
1. Upload a `.txt` file, or click "Paste Text".
2. Choose a content language.
3. Open Default Settings and confirm that the models needed for creation are available.
4. Click "Create Now".
> In the Upload Script tab, you can choose "Single-Episode Script" to upload a `.txt` file or switch to "Paste Text". After you import the content, confirm the default settings and content language, then click "Create Now".
Then continue with [Generate Your First Episode](/docs/bomitv/getting-started/first-episode.md).
### Create a blank canvas
This is best if you already have image, video, or audio assets and want to create freely with nodes.
1. Click "Create Canvas" or "Skip the script and enter the canvas directly".
2. Enter a canvas name and choose a content language.
3. After you enter Infinite Canvas, add nodes or upload assets.
Then read [Infinite Canvas Overview](/docs/bomitv/canvas/overview.md).
## 3. Learn the three work areas
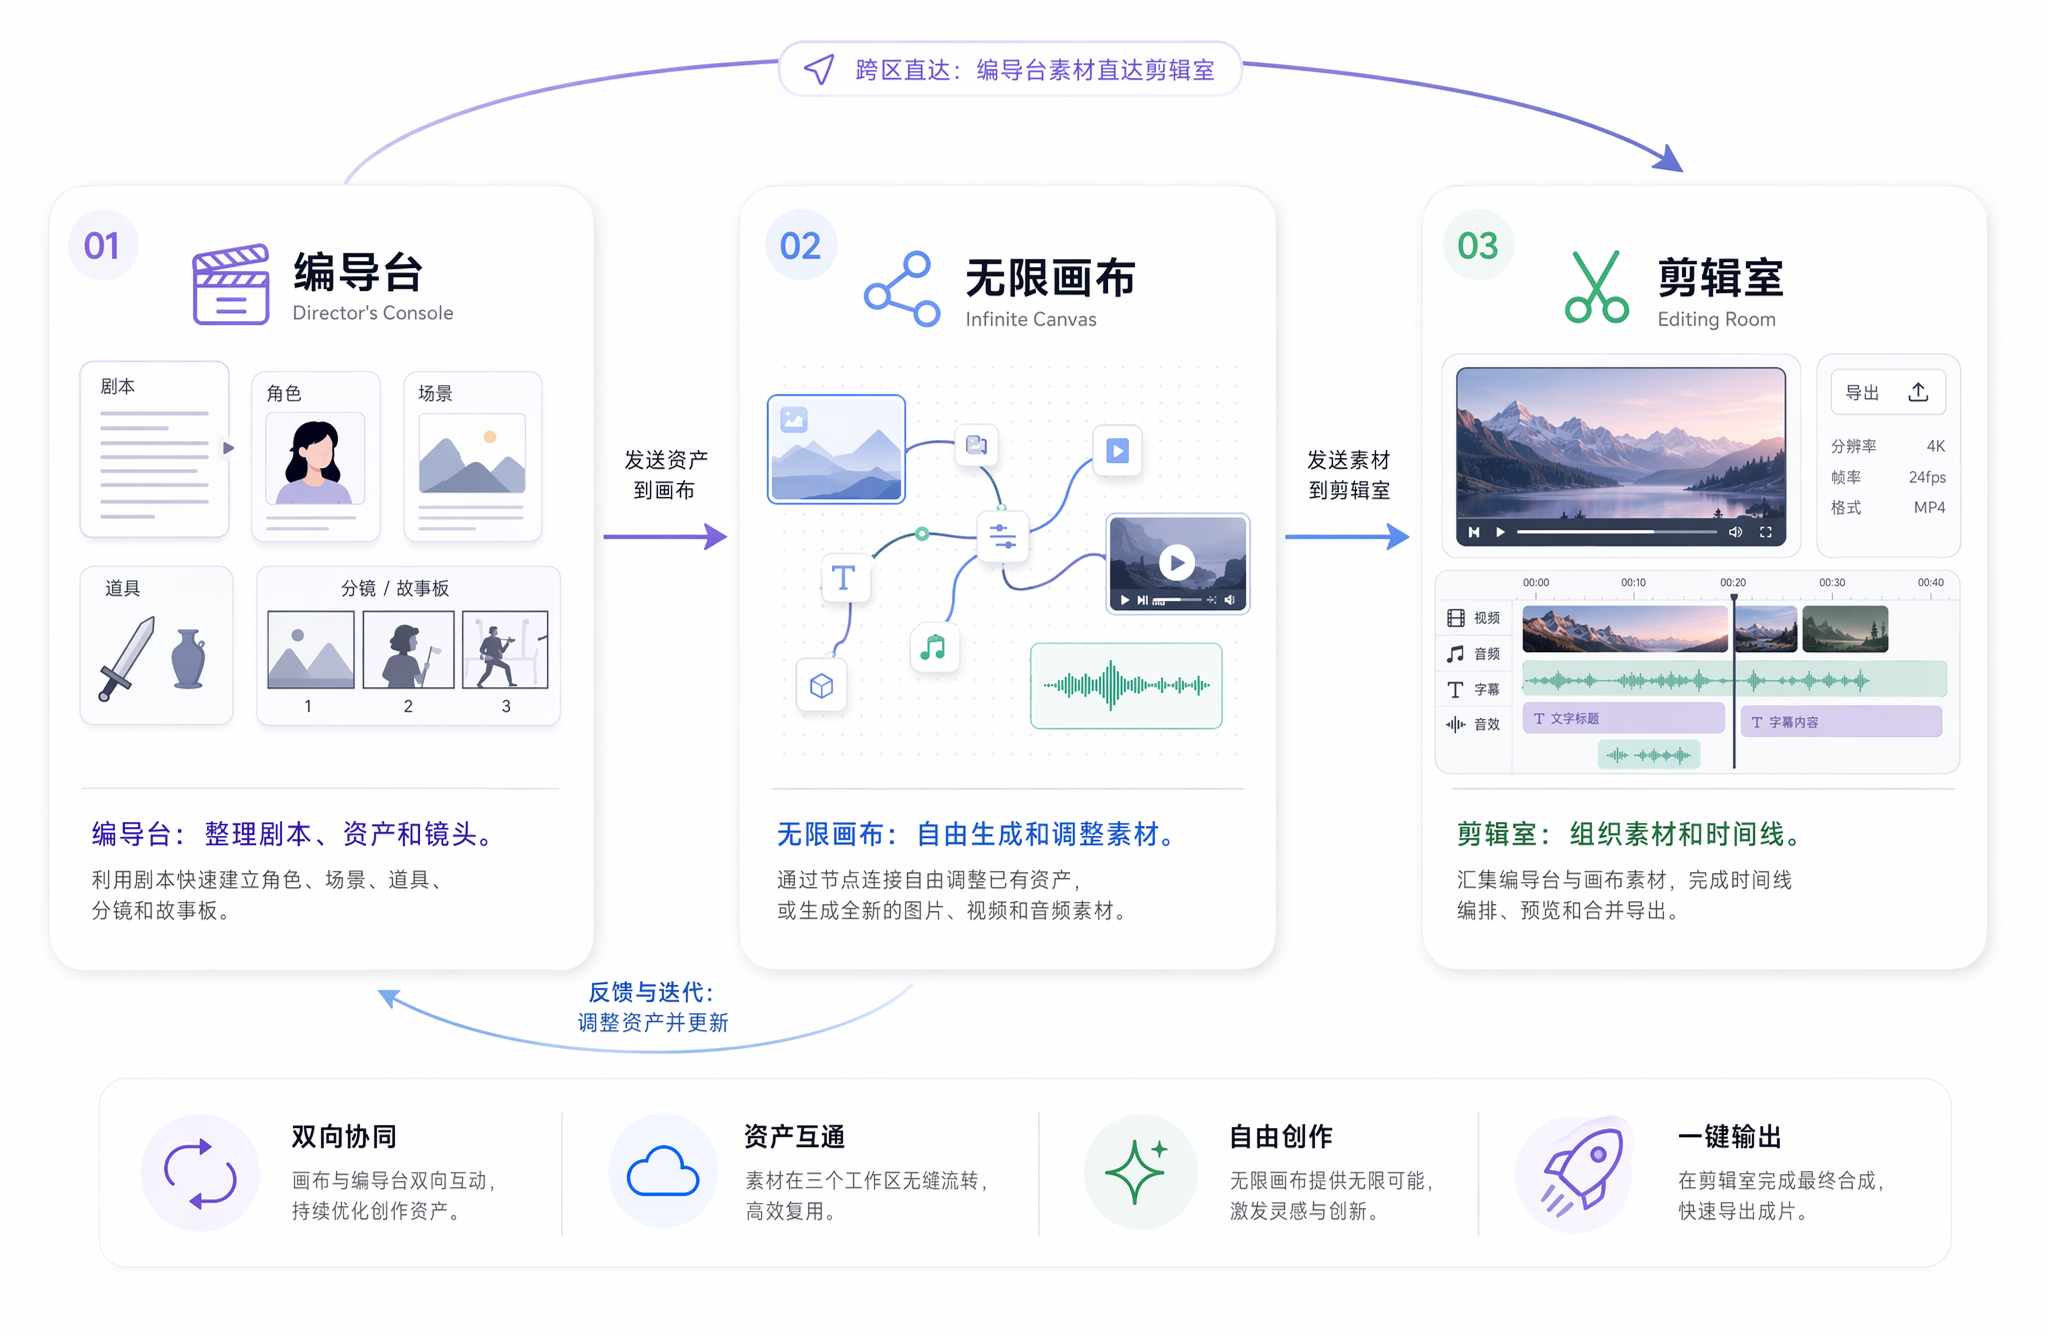
- **Director Console**: use the script to build characters, scenes, props, shots, and storyboards.
- **Infinite Canvas**: adjust existing assets freely through connected nodes, or generate new image, video, and audio assets.
- **Editor**: bring together Director Console and canvas media, then finish timeline arrangement, preview, and export.
## 4. Finish first, refine later
For first-time use, keep the default settings and run through the full workflow first. After you confirm the storyboard and the key shot direction, batch-generate the remaining content. If you need to adjust a character or scene, change the asset first, then regenerate the affected shot to avoid duplicate cost.
## Next steps
- [Generate Your First Episode](/docs/bomitv/getting-started/first-episode.md)
- [Create a Canvas](/docs/bomitv/getting-started/create-canvas.md)
- [Meet the Main Interface](/docs/bomitv/getting-started/interface.md)